
The steps to setup and connect My Post Business to the App are below.

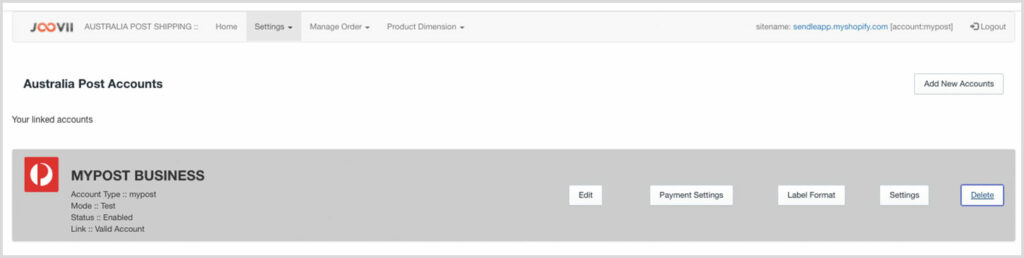
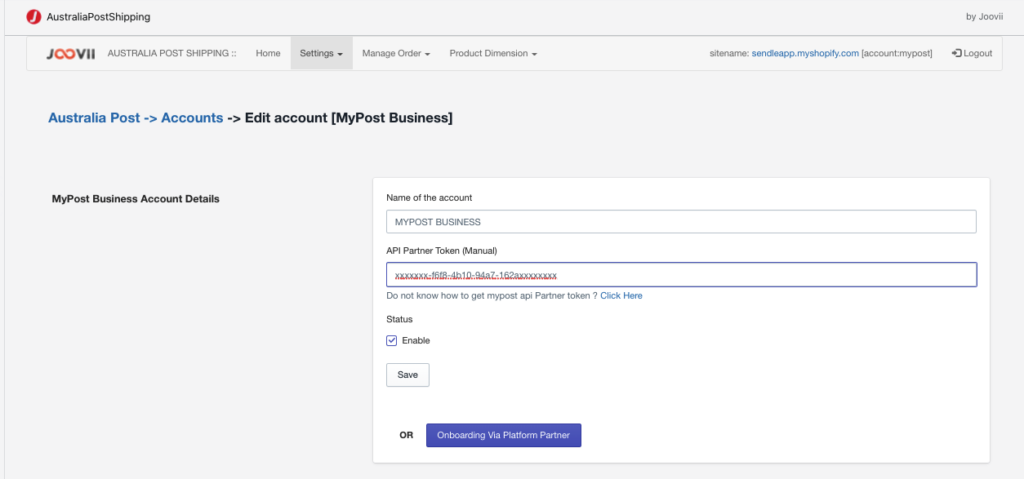
- Add/Edit Account : Merchant can add new account with name , partners token like the following screenshot.

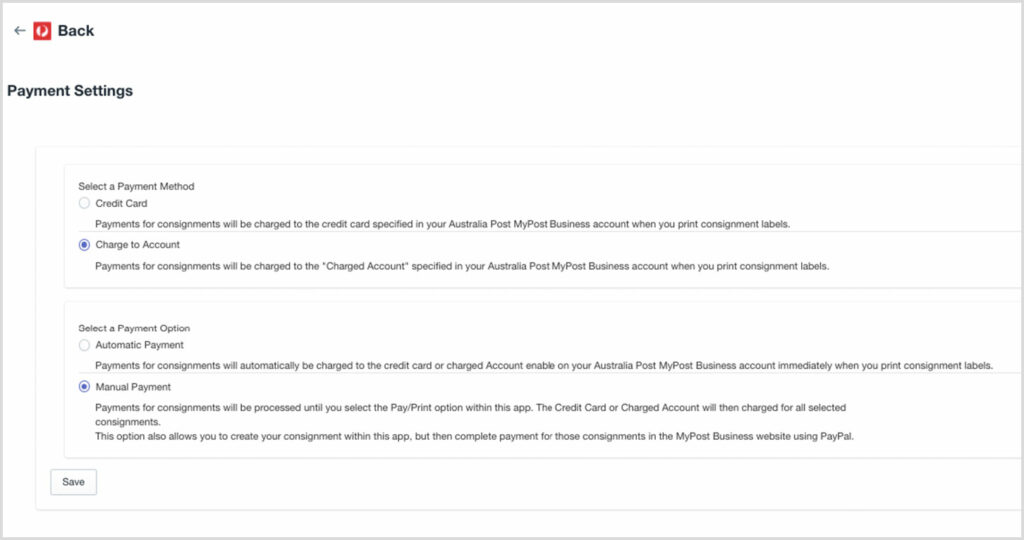
2. Configure Payment Option: There are 2 types of options in the payment setting. One is Payment Method and another is Payment Option.
A. Select a Payment Method : There are 2 types of payment method.
i) Credit card Or STORED_PAYMENT : which will make payment against the stored credit card provided by the merchant during the onboarding platform partner process. Payments for consignments will automatically be charged to the credit card or charged Account enable on your Australia Post MyPost Business account immediately when you print consignment labels.
ii) Charge to Account: which indicates the order is intended to be paid for by a Charge Account, where a subsequent Create Payment With Charge Account will be required. Payments for consignments will be charged to the “Charged Account” specified in your Australia Post MyPost Business account when you print consignment labels.
B. Select a Payment Option: There are 2 types of payment Option
i) Automatic Payment : Payments for consignments will automatically be charged to the credit card or charged Account enable on your Australia Post MyPost Business account immediately when you print consignment labels.
ii) Manual Payment : Payments for consignments will NOT be processed until you select the Pay/Print option within this app.. The Credit Card or Charged Account will then charged for all selected consignments. This option also allows you to create your consignment within this app, but then complete payment for those consignments in the MyPost Business website using PayPal.
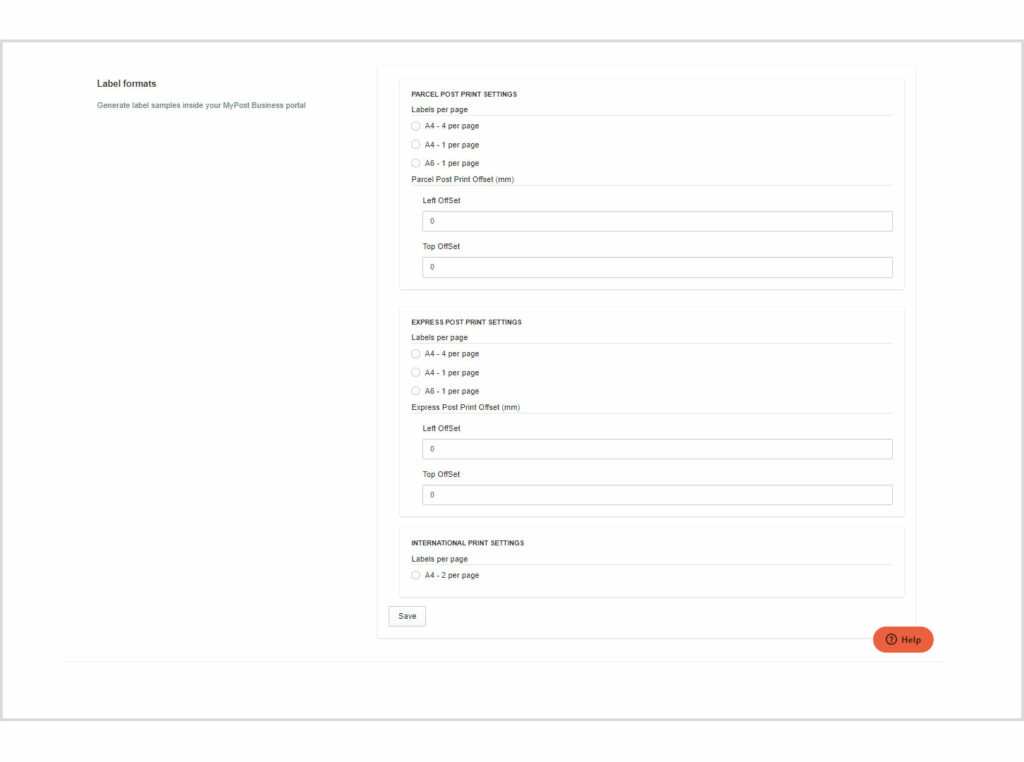
3. Configure Label format: Merchants can set the Label format. There are three different settings.
i) Parcel Post printing settings: Merchants can set labels per page, left offset and top offset.
ii) Express post printing settings: Merchants can also set label per page, left offset and top offset.
iii) International print settings: Merchants can set labels per page.
4. Set General settings: Merchant can set shipping settings. There are domestic settings and international settings.
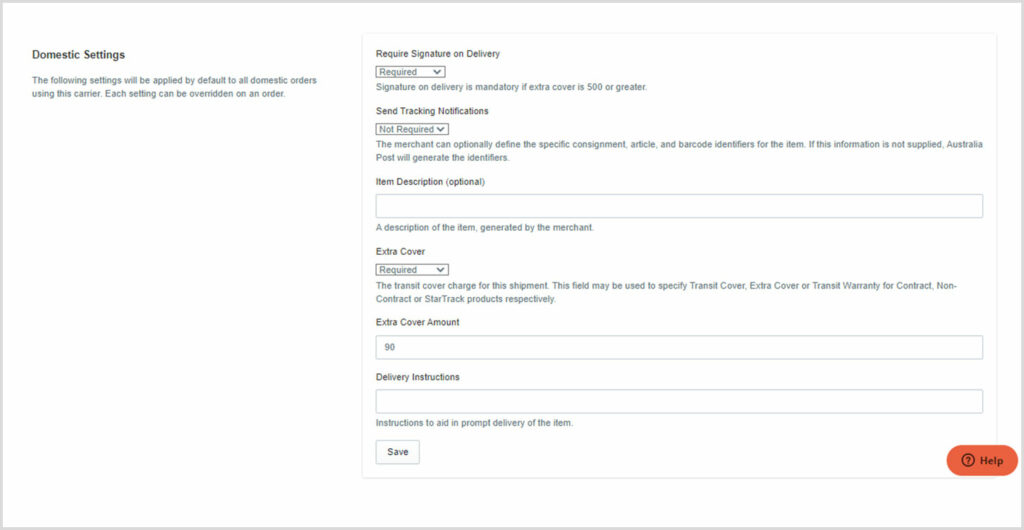
A. Domestic settings:
i) Set signature: Merchants can set whether signature is required or not in delivery. Signature on delivery is mandatory if extra cover is 500 or greater.
ii) Tracking notification: The merchant can optionally define the specific consignment, article, and barcode identifiers for the item. If this information is not supplied, Australia Post will generate the identifiers.
iii) Add descriptions of items : A description of the item, generated by the merchant.
iv) Set Extra Cover: The transit cover charge for this shipment. This field may be used to specify Transit Cover, Extra Cover or Transit Warranty for Contract, Non-Contract or StarTrack products respectively.
v) Add Extra cover amount : Merchant can add the amount for extra cover. vi) Add delivery instruction: Instructions to aid in prompt delivery of the item.
vi) Add delivery instruction: Instructions to aid in prompt delivery of the item.
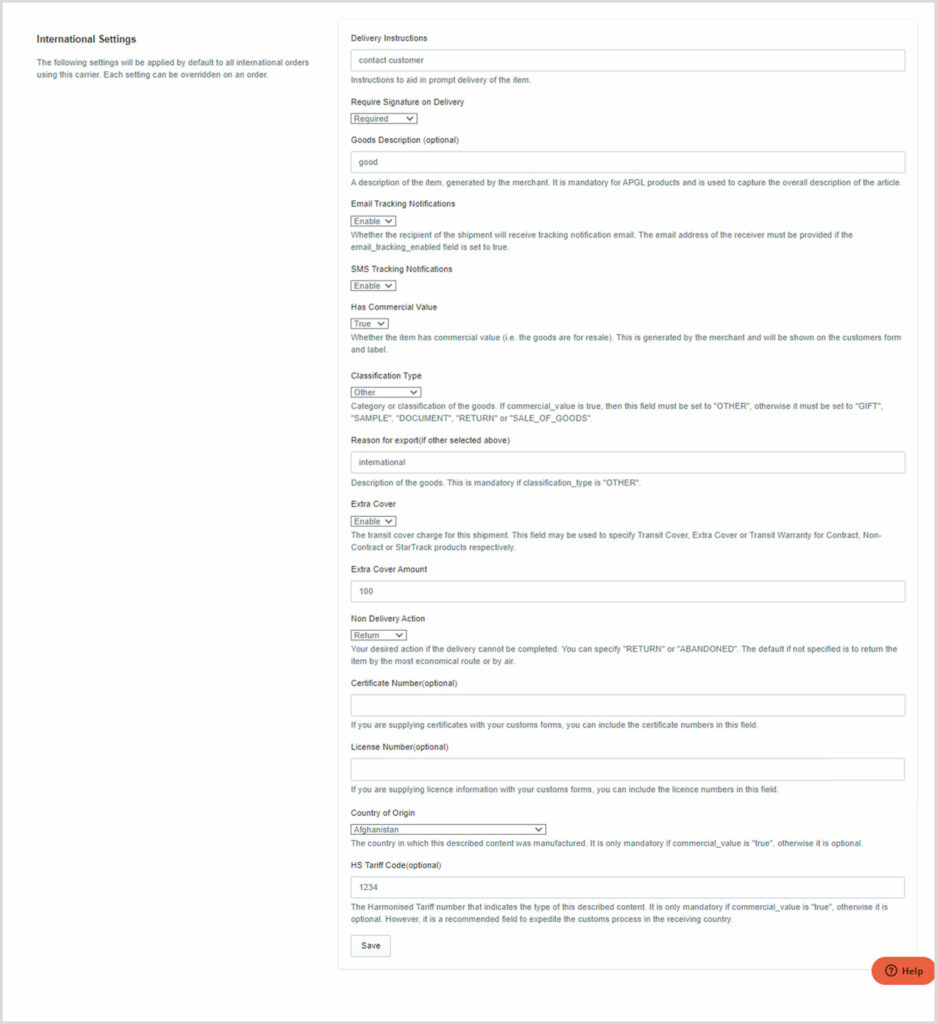
B. International settings:
i) Add delivery instruction: Instructions to aid in prompt delivery of the item.
ii) Set signature: Merchants can set whether signature is required or not in delivery.
iii) Add descriptions of items : A description of the item, generated by the merchant. It is mandatory for APGL products and is used to capture the overall description of the article.
iv) Set Email Tracking Notification:Whether the recipient of the shipment will receive a tracking notification email. The email address of the receiver must be provided if the email_tracking_enabled field is set to true.
v) Set SMS Tracking Notification: Merchant can set SMS tracking notification.
vi) Set commercial value: Whether the item has commercial value (i.e. the goods are for resale). This is generated by the merchant and will be shown on the customer’s form and label.
vii) Set Classification Type: Category or classification of the goods. If
commercial_value is true, then this field must be set to “OTHER”, otherwise it must be set to “GIFT”, “SAMPLE”, “DOCUMENT”, “RETURN” or “SALE_OF_GOODS”.
viii) Add Reason for Export: Description of the goods. This is mandatory if classification_type is “OTHER”.
ix) Set Extra Cover: The transit cover charge for this shipment. This field may be used to specify Transit Cover, Extra Cover or Transit Warranty for Contract, Non-Contract or StarTrack products respectively.
x) Add Extra cover amount : Merchant can add the amount for extra cover.
xi) Set Non Delivery Action: Your desired action if the delivery cannot be completed. You can specify “RETURN” or “ABANDONED”. The default if not specified is to return the item by the most economical route or by air.
xii) Add Certification Number: If you are supplying certificates with your customs forms, you can include the certificate numbers in this field.
xiii) Add License Number: If you are supplying license information with your customs forms, you can include the license numbers in this field.
xiv) Set Country of origin: The country in which this described content was manufactured. It is only mandatory if commercial_value is “true”, otherwise it is optional.xv) Add HS Tariff Code: The Harmonized Tariff number that indicates the type of this described content. It is only mandatory if commercial_value is “true”, otherwise it is optional. However, it is a recommended field to expedite the customs process in the receiving country.
xv) Add HS Tariff Code: The Harmonized Tariff number that indicates the type of this described content. It is only mandatory if commercial_value is “true”, otherwise it is optional. However, it is a recommended field to expedite the customs process in the receiving country.
5. Delete : Merchant can delete the account like the following screenshot.
